 AIREITER
Nano Banana Pro adapts lighting, skin texture, and perspective to the target scene rather than simply compositing one face onto another. The difference shows in edge details — jawline blending, shadow direction matching, and skin tone transitions that older tools get wrong.
A weak prompt ("swap this person") forces the model to guess what changes and what stays. A specific prompt assigns clear roles to each image and locks the elements you want preserved.
Level 1 — Your First Person Swap
Every person swap uses two images and a prompt. Image 1 is whatever you upload first — this is your identity source (the face you want). Image 2 is the target scene (the body and environment).
Two prerequisites:
Use Nano Banana Pro, not standard Nano Banana or Nano Banana 2. In the Gemini app, select "create images" and choose the thinking version. In testing, Pro produces noticeably better identity preservation than standard versions — faces stay closer to the source, with fewer instances of eye shape or nose bridge drifting during the swap.
Upload order matters. The model references uploads sequentially — your first upload becomes "Image 1" in any prompt that uses that label. Upload face source first, target scene second. Reversing the order reverses the swap.
Upload face source as Image 1, target scene as Image 2, then use this prompt:
Basic Swap Prompt: "Use Image 1 as the identity source. Use Image 2 as the target scene and body reference. Transfer the identity from Image 1 into the target person in Image 2 while preserving the target pose, clothing, lighting, camera angle, background, and composition. Match skin texture, shadows, perspective, and white balance so the edit looks natural."
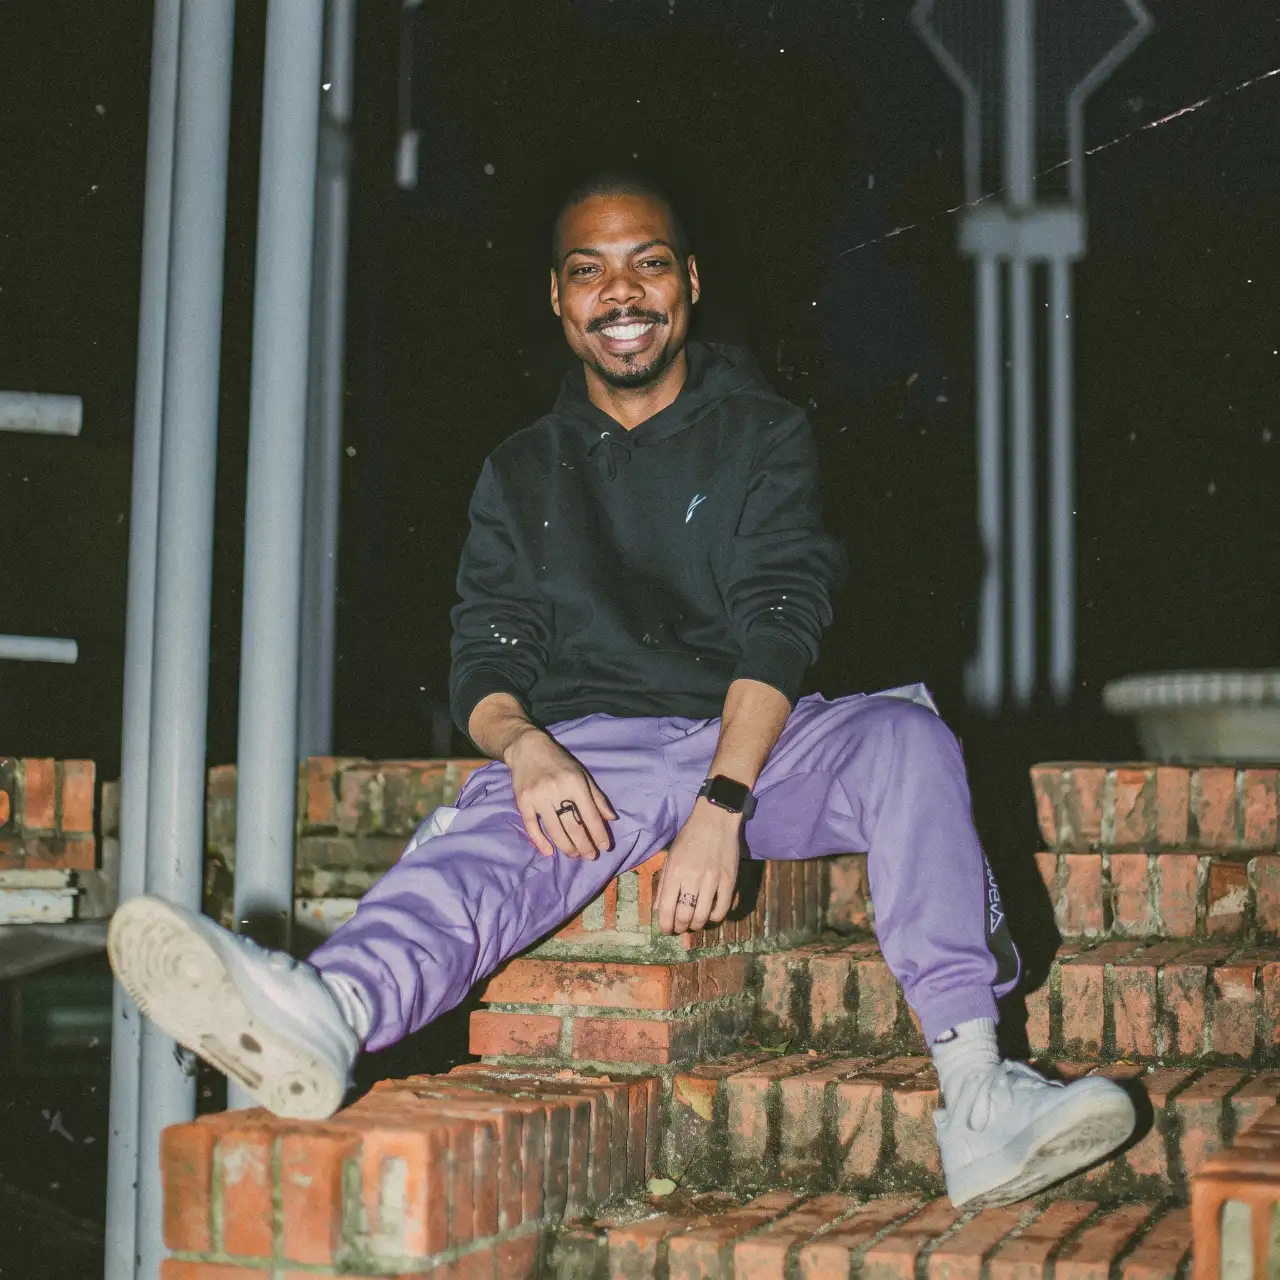
Here's what it produces — source face transferred onto the target scene, with pose, clothing, and background preserved:
Picking the Right Source Photo
Clear, unobstructed face. No sunglasses, hats, hands over face, or heavy shadows. When facial data is missing, the model reconstructs it — those reconstructions look artificial.
Straight-on or 3/4 angle. Extreme side profiles mean the model has to infer the unseen half of the face.
High resolution. Higher-resolution source images preserve more facial detail in the output. Low-res sources tend to produce over-smoothed results.
Similar lighting to target. When the source has harsh directional light and the target has soft diffused light, the model has to reconcile conflicting shadow patterns.
Level 2 — Controlling What Changes and What Stays
The Lock-In Technique
Describe what should NOT change with at least as much detail as the swap itself. When your prompt leaves elements unspecified, the model may alter them.
Lock-In Prompt Template: "Use Image 1 as the identity source. Use Image 2 as the target scene and body reference. Replace ONLY the face identity in Image 2 with the identity from Image 1. DO NOT change: the target's pose, body shape, clothing (including fabric texture and color), hairstyle, makeup, background, lighting setup, camera angle, or image composition. Preserve skin tone transitions at the jawline and neck. Match the environmental lighting on the swapped face to the existing scene lighting."
The explicit "DO NOT change" list and jawline skin tone instruction target the two most visible failure points.
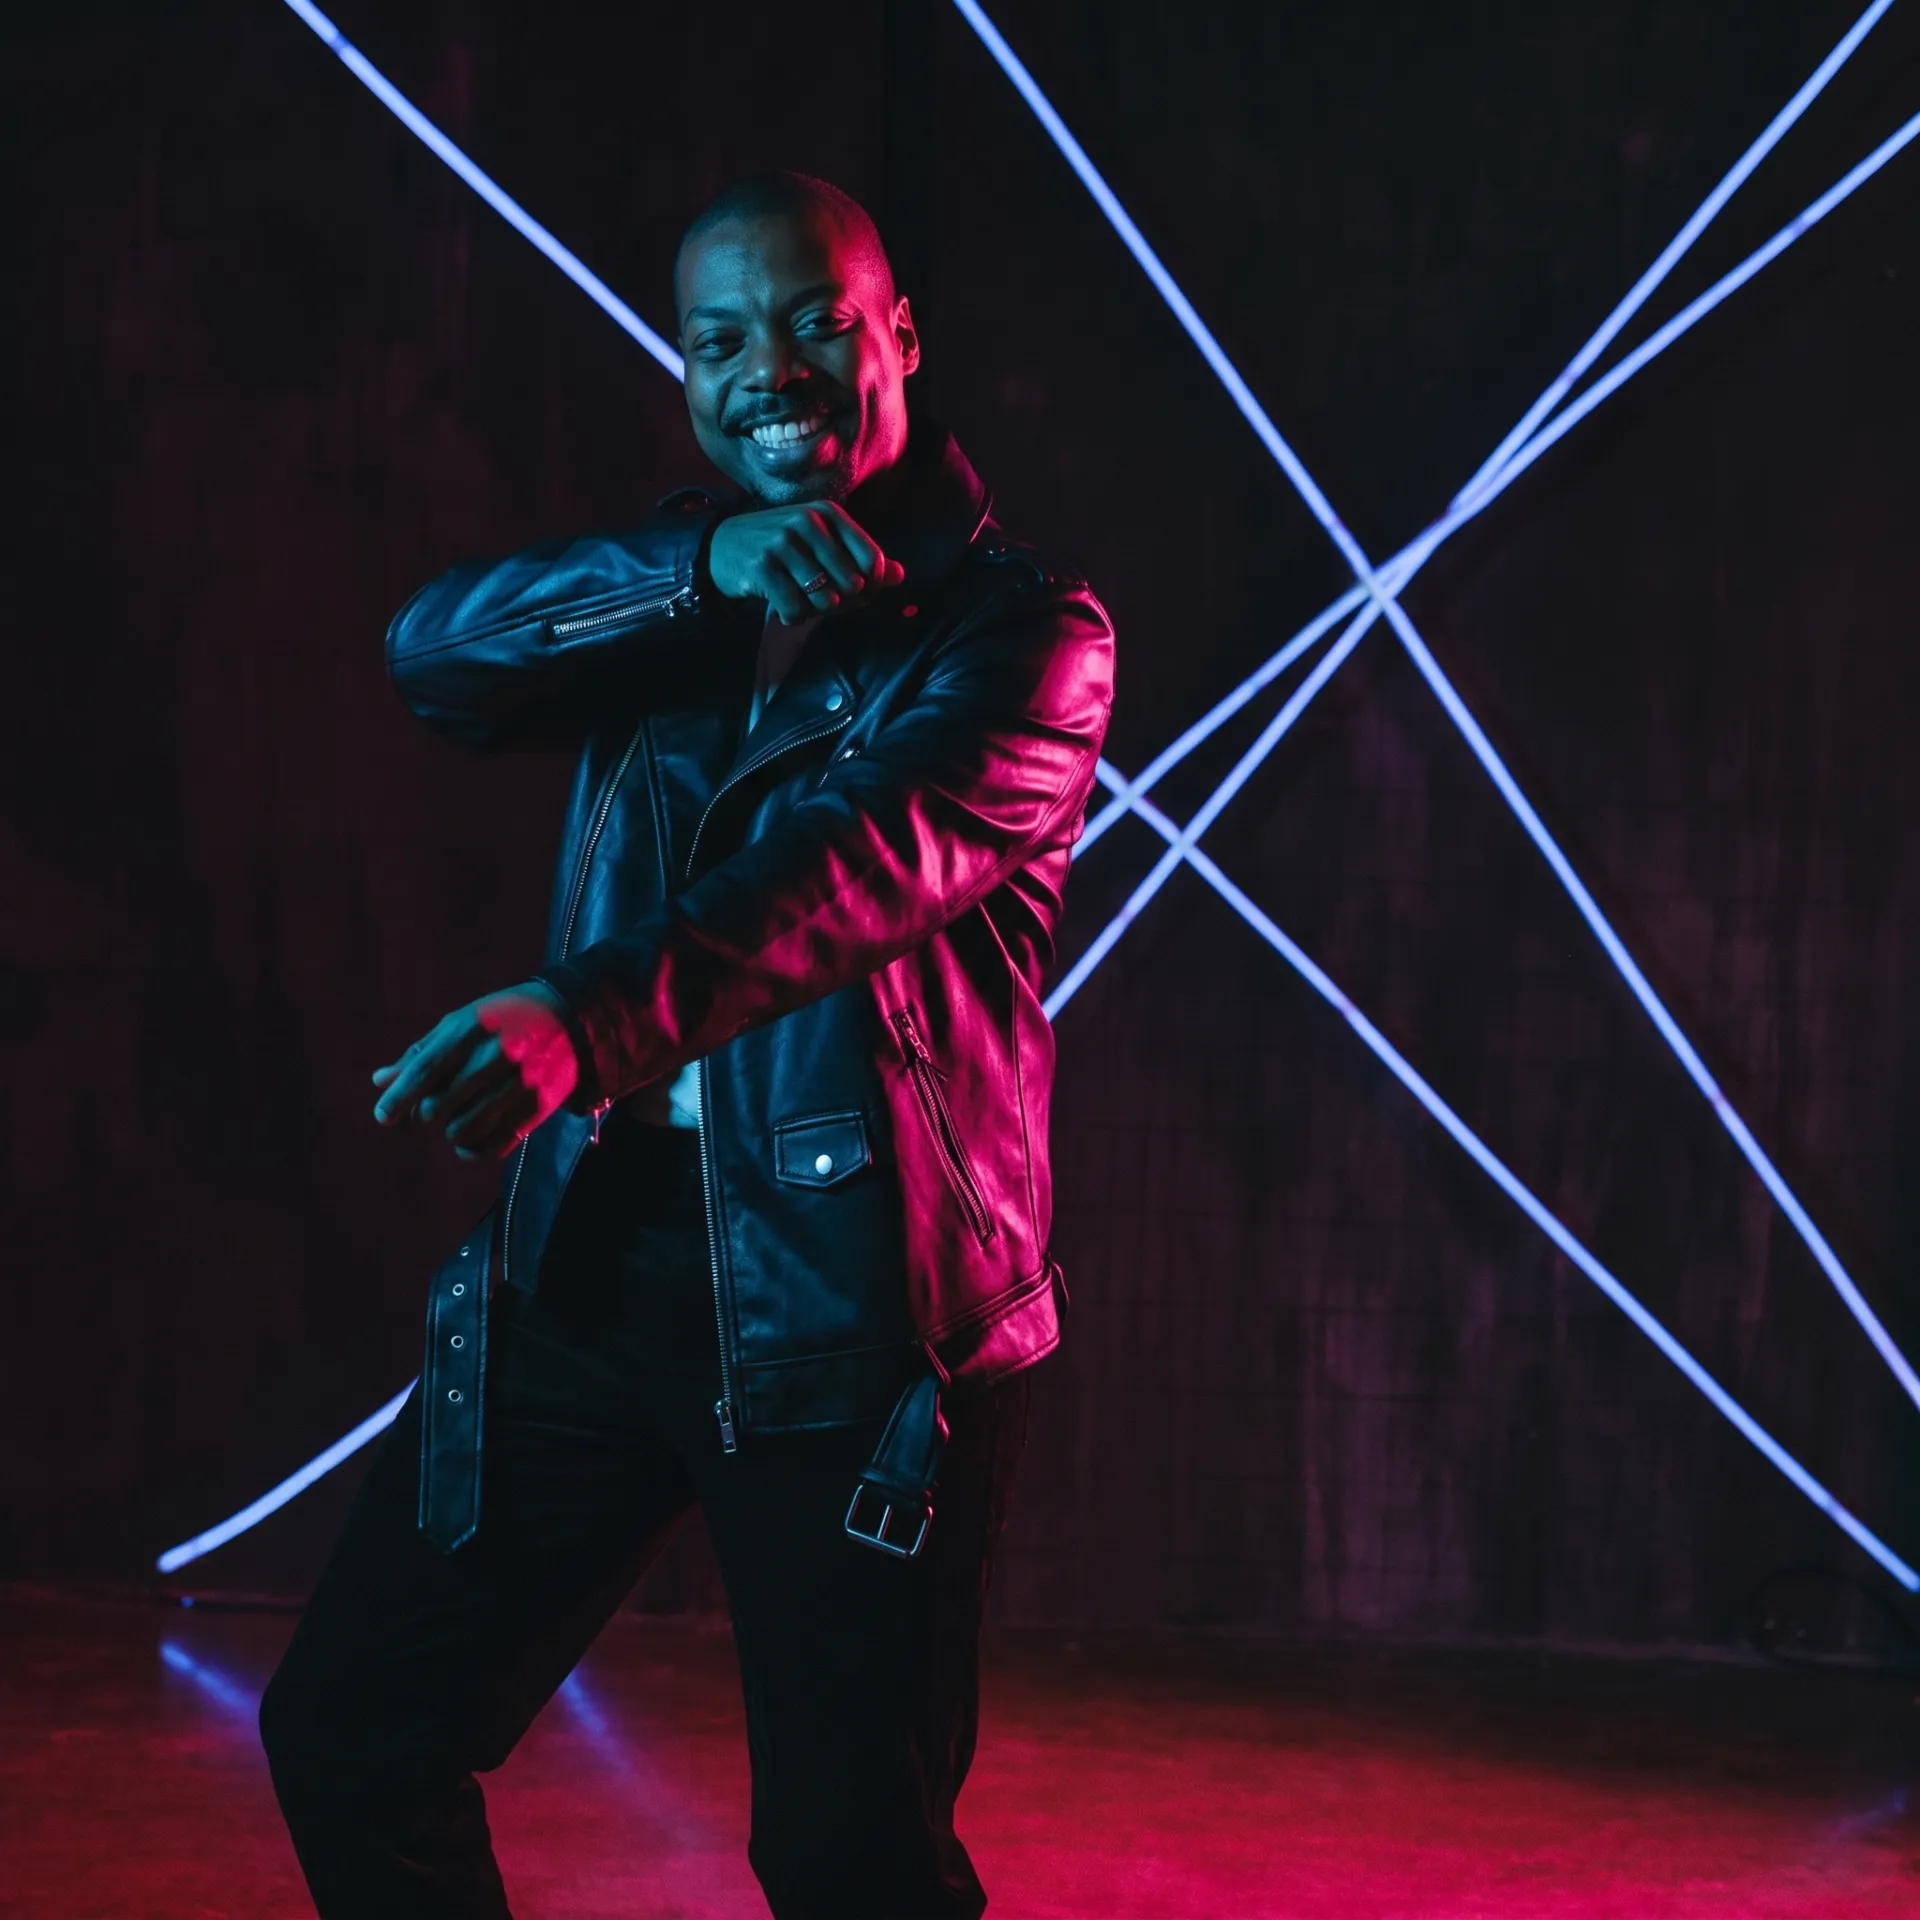
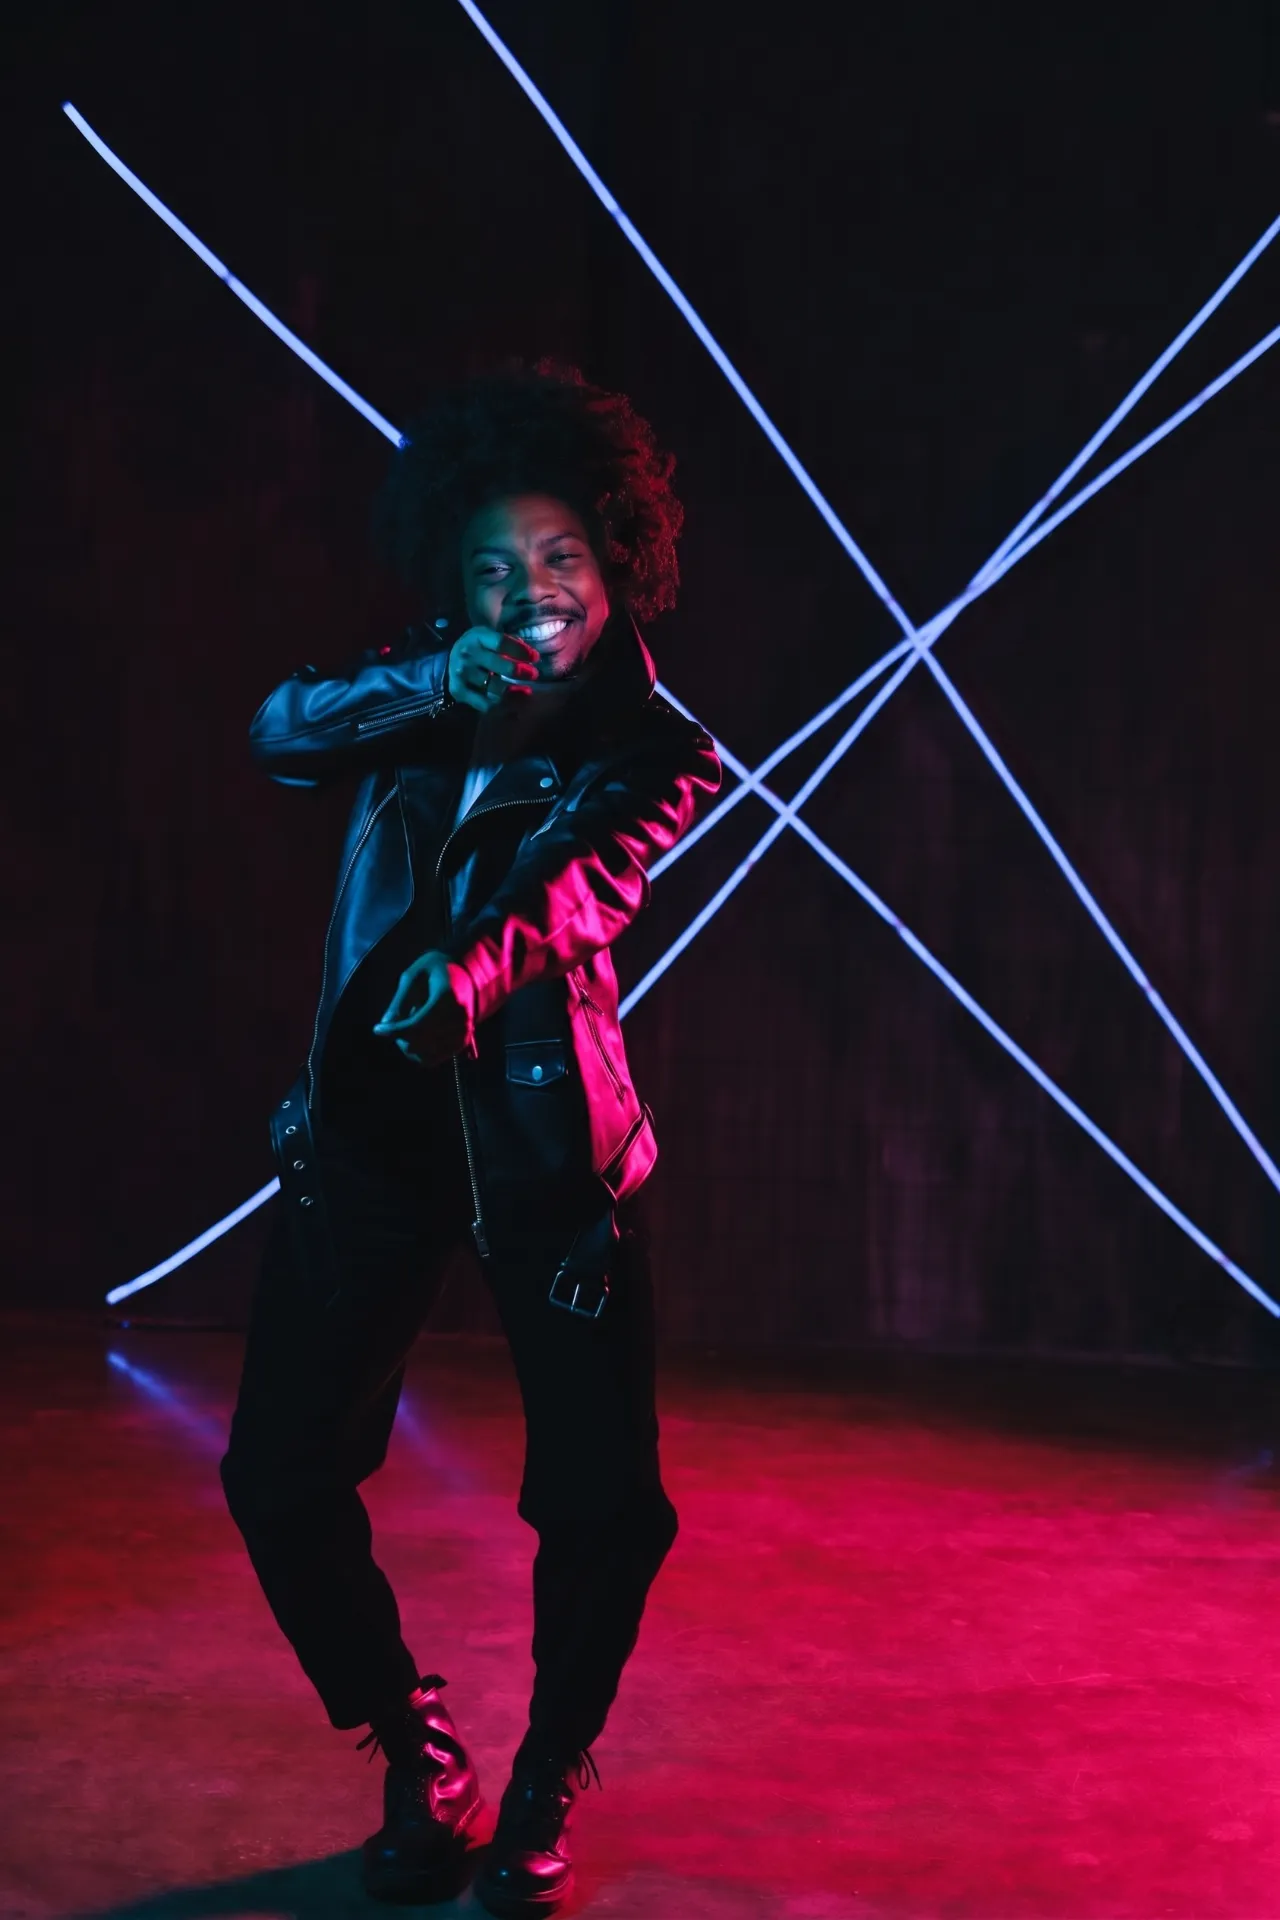
The difference is visible in practice. Without Lock-In (left), a vague prompt like "put the face from image 1 onto image 2" let the model change the hairstyle — the original curly hair disappeared. With Lock-In (right), the explicit preservation list kept the hair, clothing, and pose intact:
Face-Only vs. Full-Body Swap
Before writing a prompt, decide which image "owns" the body:
Face-only swap — target image owns everything except the face. Use the Lock-In template above.
Full-body swap — target image only owns background and camera. The source person's entire appearance transfers:
"Use Image 1 as the complete identity and appearance reference. Use Image 2 as the scene and camera reference only. Place the person from Image 1 into the scene from Image 2. Preserve their face, body proportions, skin tone, and general appearance. Match the scene's lighting, perspective, and camera angle. Background, framing, and composition come from Image 2."
Photography Parameters for Photorealistic Results
Photorealistic Swap Prompt: "Use Image 1 as the identity source. Use Image 2 as the target scene. Transfer the identity from Image 1 into Image 2. Shoot at f/2.8, 85mm equivalent focal length. Preserve the target's Rembrandt lighting pattern — key light at 45° camera-left, fill ratio 3:1. Maintain shallow depth of field on the background. Skin rendering: preserve natural pores, micro-texture, and subsurface scattering. No airbrushing. Color grade: match Image 2's existing white balance and color temperature."
Useful parameters:
Parameter | What it controls | Example values |
|---|---|---|
f-stop | Background blur / depth of field | f/1.8 (dreamy), f/2.8 (portrait), f/5.6 (sharp) |
Focal length | Facial perspective distortion | 50mm (natural), 85mm (portrait flattering), 135mm (compressed) |
Lighting style | Shadow pattern | Rembrandt, butterfly, split, broad, loop |
Fill ratio | Shadow contrast | 2:1 (soft fill), 4:1 (dramatic), 8:1 (noir) |
Skin rendering | Texture realism | "natural pores," "subsurface scattering," "no airbrushing" |
Troubleshooting: Swap Problems and Fixes
Symptom | Cause | Prompt Fix |
|---|---|---|
Wrong person swapped | Upload order reversed, or model can't identify the target in a group | Re-upload in correct order. In groups, describe the target by position and clothing |
Face drift (features change from source) | Identity constraints too loose | Add: "IDENTITY LOCK: preserve exact facial geometry, eye shape, nose bridge, lip fullness, jawline contour from Image 1. No identity drift." |
Plastic/over-smoothed skin | Low-res source or model defaulting to beautification | Use higher-res source. Add: "Preserve natural skin pores, imperfections, and micro-texture. No smoothing." |
Visible seam at jawline | Skin tone mismatch between face and neck | Add: "Blend skin tone at jawline and neck seamlessly. Match undertone from Image 2's body." |
Lighting mismatch on face | Source and target have different lighting | Add: "Match the swapped face's shadow direction and color temperature to Image 2's scene lighting." |
Clothing or hair changed | Lock instructions missing | Add explicit "DO NOT change" list for clothing, hairstyle, accessories |
Background altered | Model over-interpreted edit scope | Add: "Background must remain identical to Image 2. No modifications outside the face region." |
Bystanders changed | Model edited all people instead of target | Use the two-step inventory method (Level 3) to isolate the target |
Fix priority: Role assignment errors first (wrong person, reversed order) → identity fidelity (face drift, plastic skin) → integration quality (seams, lighting). A face on the wrong person means the model never understood the assignment — no amount of quality tuning fixes that.
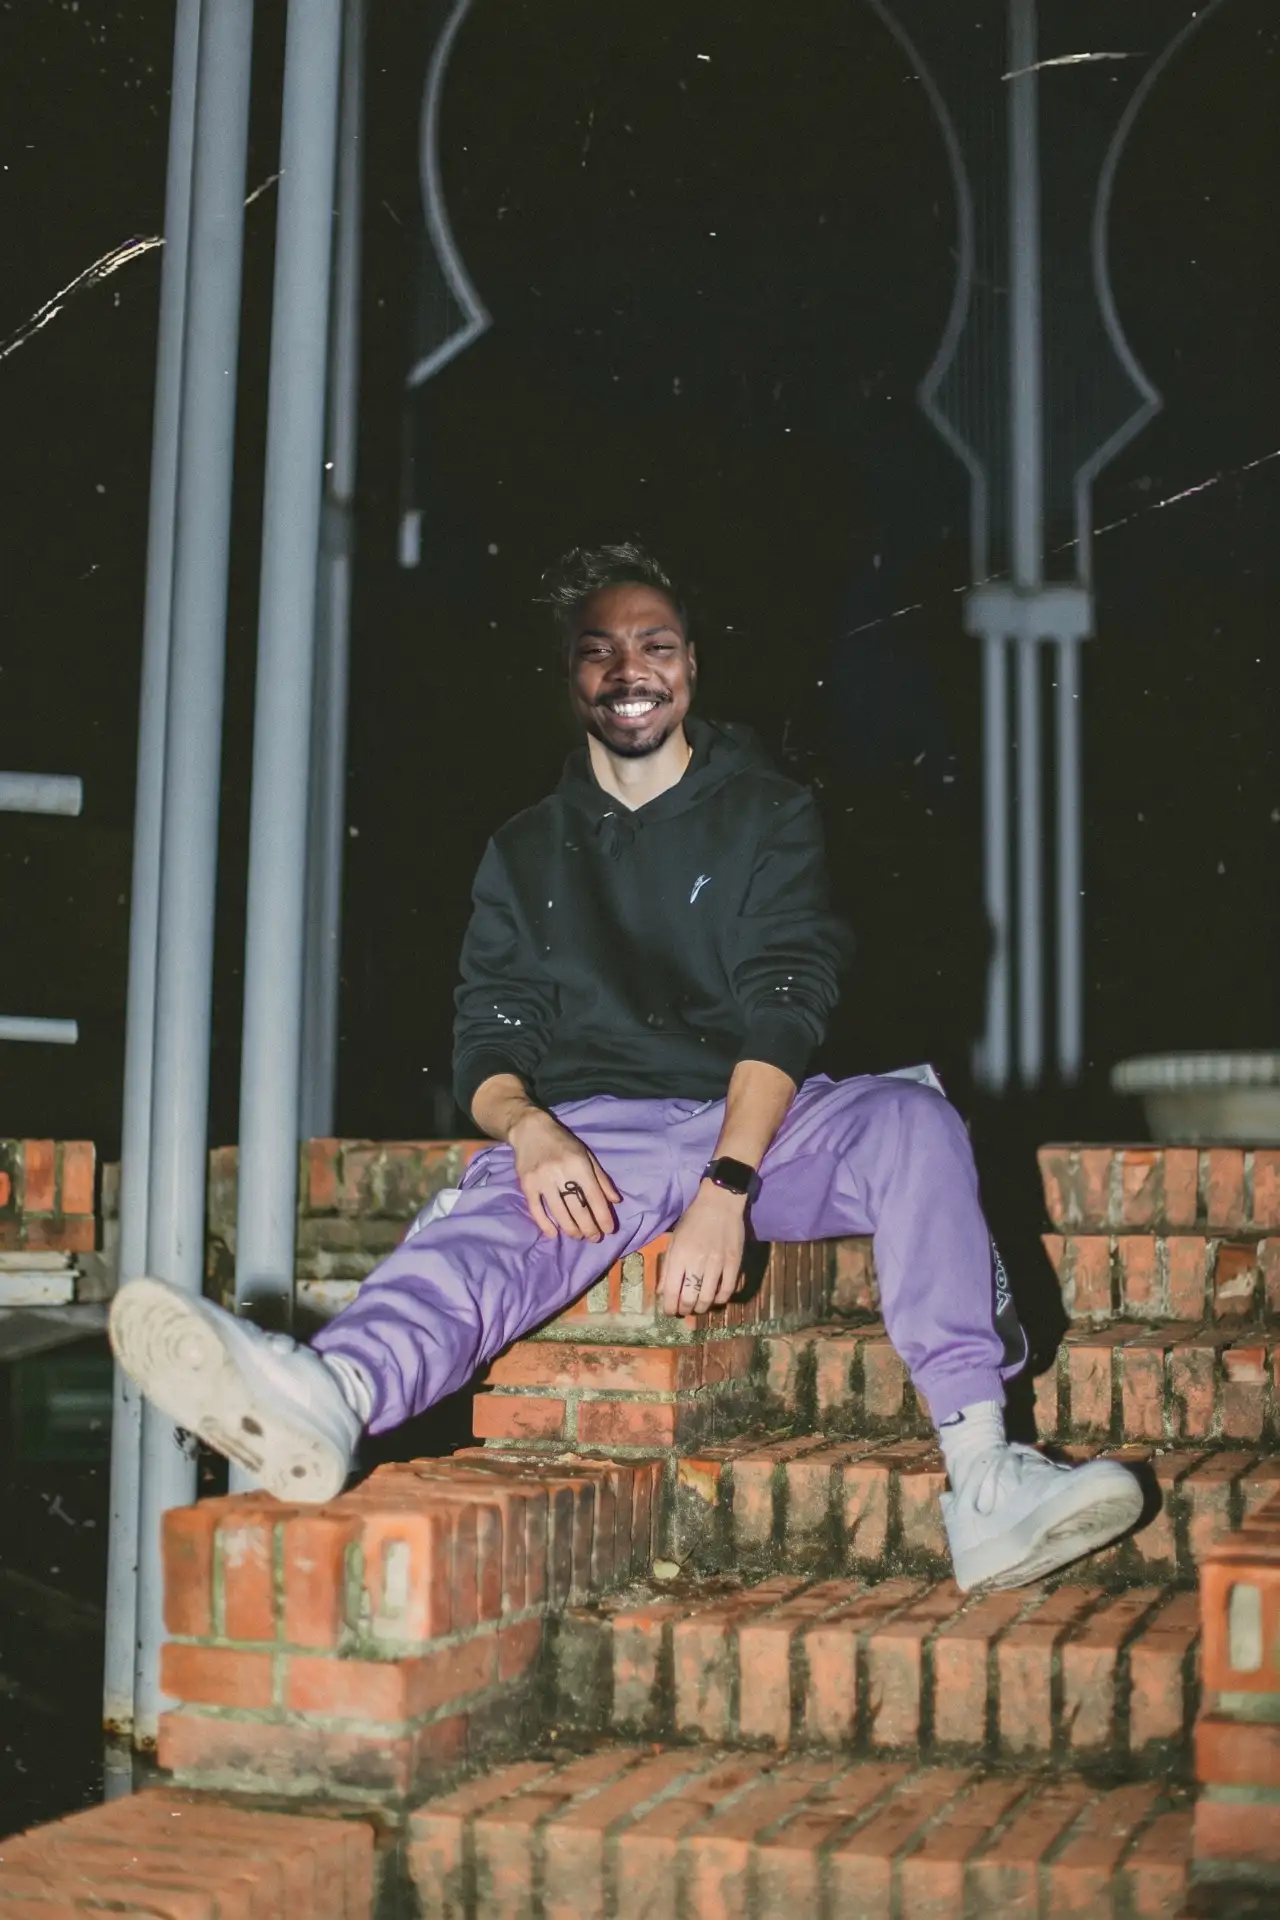
Here's a real example of face drift vs. Identity Lock. The vague prompt "swap this person into this photo" (left) produced a looser interpretation — the background structure changed and facial features drifted. The Identity Lock prompt (right) kept the face closer to the source:

Handling Safety Filters
Nano Banana Pro has content safety filters that may reject certain person swap prompts. Common triggers and workarounds:
Celebrity faces: Prompts requesting swaps involving recognizable public figures are more likely to be blocked. Using your own photos or stock images avoids this.
Suggestive or intimate content: Swaps placing faces onto revealing or intimate images will be rejected. Keep target scenes appropriate.
Deceptive framing: Prompts that imply creating fake evidence or impersonation ("make it look like X did Y") trigger safety blocks. Frame prompts as creative editing rather than deception.
Google applies SynthID watermarking to all Nano Banana Pro outputs.
Level 3 — Advanced Techniques
Multi-Person Scene Swaps
Group photos break basic prompts. The model confuses who to swap, edits the wrong person, or changes bystanders.
Use the two-step inventory method:
Step 1 — Map the scene (no edits):
"Image 2 contains three people. Person A is on the left wearing a blue jacket. Person B is in the center wearing a white shirt. Person C is on the right wearing a red dress. Identify and label each person. Do not modify the image."
Step 2 — Execute with labels:
"Replace ONLY Person B (center, white shirt) with the identity from Image 1. Person A (left, blue jacket) and Person C (right, red dress) must remain completely unchanged — same face, same pose, same expression, same position. Only Person B's facial identity changes."
The 5-Component Prompt Framework
For complex or repeatable swaps, structure your prompt with five explicit components:
Component | Purpose | Example |
|---|---|---|
1. Identity Source | Who provides the face | "Image 1 provides facial identity: face shape, eyes, nose, mouth, skin tone" |
2. Target Scene | What provides everything else | "Image 2 provides body, pose, clothing, background, lighting, composition" |
3. Transfer Scope | What moves from source to target | "Transfer: facial geometry, skin texture, eye color, facial hair" |
4. Lock List | What must NOT change | "Lock: pose, clothing, hairstyle, background, camera angle, other people" |
5. Quality Rules | Rendering standards | "Seamless jawline blend, natural pores, shadow-matched, no smoothing" |
5-Component Example:
"IDENTITY SOURCE (Image 1): Provides facial identity — face shape, eyes, nose, mouth, skin tone, facial hair.
TARGET SCENE (Image 2): Provides body, pose, clothing, background, lighting, composition. Replace the main subject (center frame).
TRANSFER: facial geometry, skin texture, eye color, facial structure. Nothing else from Image 1.
LOCK: pose (exact), clothing (fabric, color, wrinkles, fit), lighting direction and intensity, background, other people, composition.
QUALITY: seamless skin tone at jawline and neck, natural pores preserved, shadow direction matches scene, no over-smoothing."
Expression and Style Control
Person swap prompts aren't limited to face replacement. The same mechanics handle:
Expression adjustment (no swap — single image):
"Using Image 1 only: adjust the person's expression to a natural, warm smile. Keep their identity, clothing, background, and lighting identical. Do not change facial features or identity — only the expression."
Cosplay transformation:
"Make the person in Image 1 cosplay as the character from Image 2. Preserve the person's exact face and identity from Image 1. Apply the character's costume, hairstyle, and accessories from Image 2. Match lighting and background to the character's scene."
Artistic style transfer (with identity preservation):
"Render the person from Image 1 in a sfumato oil painting style. Preserve their exact facial features, proportions, and identity. Apply soft, diffused lighting with warm golden tones. Background: Renaissance-era interior with chiaroscuro lighting. Medium: oil on canvas texture visible in brushwork."
Clothing Swap Workflow
Swapping clothing while keeping the person identical requires a different approach — you need the model to "see" an outfit from one image and apply it without changing the wearer.
Direct method:
"Use Image 1 as the person reference — preserve their face, body, hair, and pose exactly. Replace ONLY their clothing with the outfit shown in Image 2. Match the outfit's fabric type, color, pattern, and fit. DO NOT change anything about the person."
Extraction-first method (more reliable for complex outfits):
Use a vision AI to describe the target outfit: "Analyze Image 2. Describe the clothing in detail: garment type, fabric, color, pattern, fit, accessories."
Feed that text into your swap prompt: "Using Image 1 as the person reference, replace their clothing with: [extracted description]. Preserve the person's face, body, hair, and pose exactly."
For specific fabrics, name them — "crushed velvet blazer," "raw denim jacket," "brushed cashmere sweater." Vague terms like "jacket" give the model too much interpretive freedom.
Ready-to-Use Prompt Templates
Template 1: Product Ad Model Swap
"Use Image 1 as the new model identity. Use Image 2 as the advertisement layout. Replace the model's face in Image 2 with the identity from Image 1. PRESERVE: product placement, brand elements, model's pose, lighting setup (key light direction, fill ratio, rim light), background, and ad aesthetic. Render at f/2.8 with shallow depth of field. The product remains the hero element."
Template 2: Couple Photo Creation (3 images)
"Use Image 1 as Person A's identity. Use Image 2 as Person B's identity. Use Image 3 as the scene reference. Place Person A on the left and Person B on the right, matching Image 3's positioning. Both faces must exactly match their source images — no identity drift on either person. Match Image 3's lighting, shadows, and perspective."
Template 3: Historical/Fantasy Character Insertion
"Use Image 1 as the identity source. Use Image 2 as the period setting reference. Insert the person from Image 1 as the main character in Image 2's scene. Preserve their exact facial features and skin tone. Adapt clothing and accessories to match the scene's time period. Camera and lighting: match Image 2's existing setup. Skin: preserve natural texture, no smoothing."
Template 4: Social Media Quick Swap
"Swap the face from Image 1 onto the person in Image 2. Keep pose, outfit, background, and lighting from Image 2. Match skin tone at jaw and neck. Natural look — no airbrushing."
Template 5: Professional Portrait in New Setting
"Use Image 1 as the identity source. Use Image 2 as the professional environment. Place the person from Image 1 into Image 2's setting. Soft key light at 30° camera-right, white fill camera-left, hair light from above-behind. 85mm f/2.8 rendering. Preserve exact facial features and natural skin texture from Image 1. Attire matches Image 2's dress code."
Where to Use These Prompts
These prompts work across platforms that offer Nano Banana Pro access:
Gemini app (gemini.google.com) — upload images directly in the chat. Free tier has limited generations; Gemini Advanced ($20/month via Google One AI Premium) unlocks full access.
Google AI Studio — API access with more control over parameters but requires developer setup.
Third-party API platforms — services like AIReiter provide pay-per-use API access to Nano Banana Pro without monthly subscriptions.
The Gemini app's safety filters are more restrictive than API access — a prompt that works in AI Studio may get rejected in the app.
FAQ
What's the difference between Nano Banana Pro and Nano Banana 2?
Nano Banana Pro uses a thinking mode that appears to process identity consistency before rendering — in practice, faces stay closer to the source with fewer drift artifacts. Nano Banana 2 generates faster but produces more identity variation across swaps. For person swaps where accuracy matters, Pro is worth the extra generation time.
Is AI face swapping legal?
The technology is legal. Legal risk comes from the output: swapping faces in your own photos is fine; creating non-consensual impersonation, intimate imagery, or fraudulent content is illegal in most jurisdictions. When publishing swapped images, disclose the edit.
Why does my swap look "plastic" or over-smoothed?
Usually a source image resolution issue or missing prompt detail. Use higher-resolution source photos and add "preserve natural skin pores, imperfections, and micro-texture — no over-smoothing, no airbrushing" to your prompt. See the troubleshooting table above for additional fixes.
How do I swap just one person in a group photo?
Use the two-step inventory method in Level 3: first tell the model to identify and label each person by position and clothing, then issue the swap prompt targeting only the labeled person. This prevents the model from editing bystanders.